

A few months ago we re-rigged a Tartan 37 and as an added request the owner asked us if we would replace the centerboard pennant hose for him while the mast was down.
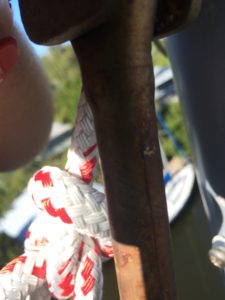
We had done a rigging inspection prior and found a crack in the headstay top swage eye.
Here is the crack from aloft – note how it looks a lot like a swage die scar
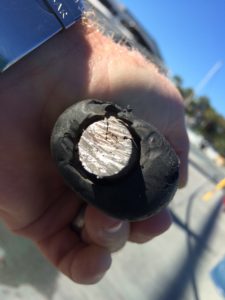
This is a picture of the swage after we cut it in half – cracked right through!
Anyway, the standing rigging replacement was fairly standard apart from the Harken furler being extremely difficult to take apart. In the end we managed to get it mostly apart, enough for us to replace the headstay without sacrificing the furler.
If you are planning on re-rigging your Tartan 37 (or any other sailboat for that matter) please don’t hesitate to contact us if you need advice or are looking for a knowledgeable standing rigging supplier.
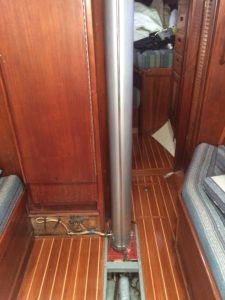
Back to the centerboard pennant hose and conduit. This was a first for us, so we did a little research and inspected things before figuring out how best to tackle the job. The way the conduit is set up is as follows: the centerboard pennant exits the centerboard trunk in a forward direction about 6 inches below and 6 inches behind the mast step and all that is visible from the trunk is a short section of SS pipe approx 2.5 inches long protruding from the forward top edge. This short piece of pipe is connected to another much longer piece of SS pipe by a 6 inch long piece of hose with hose clamps and sealant. The longer piece of SS pipe runs forward underneath the mast step and then has a 90 degree bend that leads the pipe up through the center of the mast step and directly up inside the mast for approximately 4 feet. There is then an additional 2 feet or so of pvc pipe threaded onto the top end of the SS pipe to act as additional anti siphon height. The pennant hose runs from the centerboard, through the short SS pipe, through the 6 inch hose, up the long SS pipe and PVC section, then up the inside of the mast and out of an exit sheave a couple feet above the deck.
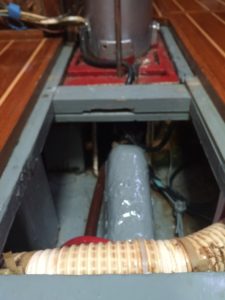
The following are pictures of the trunk exit-long pipe connection. Note the flexible hose connected with hose clamps.
Looking forward Close-up looking forward
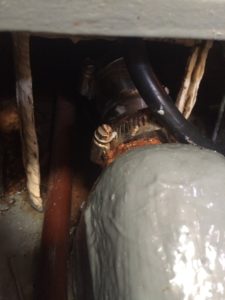
Rusted hose clamps The hose was pretty rotten
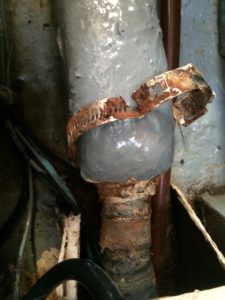
The image below shows the two pieces of pipe where they almost meet. The mast step is to the left, the pipe exiting the trunk is slightly right. The old flexible hose is resting up on the trunk after we cut it off.
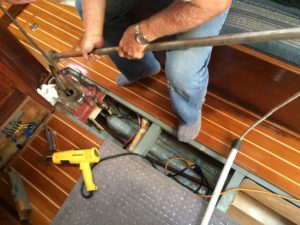
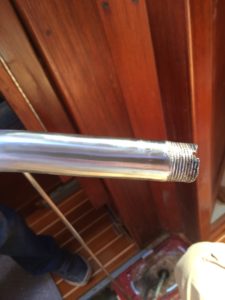
This is how to remove the long SS pipe, after disconnecting the flexible hose – yes, its hard to access and you might swear while disconnecting the hose clamps – tilt aft and lift up. Note the heat gun – we used it to help with the removal of the flexible hose. You can also see there is a small round plate welded onto the pipe where it meets the mast step. This is secured with three self tapping screws.
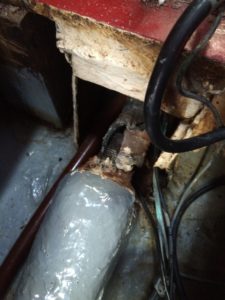
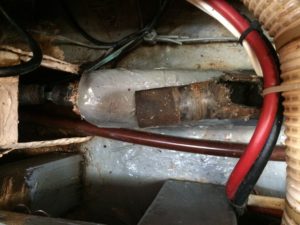
Initially we were planning on just changing out the flexible hose but after removing the hose we noticed that the stainless conduit was pretty badly corroded (almost all the way through in places) so we had the voids filled with weld (weld with high chromium and nickel content to avoid weld corrosion) and polished. The corrosion isn’t really unexpected because, as we know stainless steel in an oxygen starved environment is highly likely to corrode.
Here are before and after photos of the corroded pipe.

So now we had to re-install the conduit with new marine grade reinforced hosing. First we attached the hose to the end of the pipe, then we fished the pennant line up through the pipe, and then we inserted the pipe down through the step and aligned it with the short section that protrudes from the trunk.
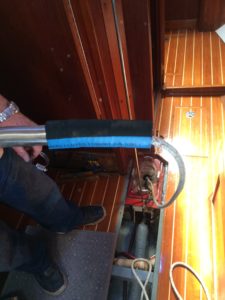
The last step was fiddly, a little messy, but very doable. Install two hose clamps on each pipe connection, screw the round plate back onto the mast step and reattach the 2 foot length of pcv to the top of the long SS pipe. We actually added some sealant to the connections to help ensure a good seal.

Next step was stepping the mast after the re-rig. Don’t forget to prep the pennant to be fished up and out of the mast before you lower the mast through the deck collar.
Hopefully this post will help any Tartan 37 owners who need to work on their centerboard control system. Please feel free to comment on this post or contact us directly if you’d prefer.


